
If you are following my post, previously, I looked at exporting the pile coordinates either from Survey Point or Project Base Point and explained in details where the results are coming from with the help of diagrams. If you missed that section, you better go back to that article first before continue reading this one.
Here is the link for that article: Exporting Pile Coordinate from Survey Point instead of Project Base Point
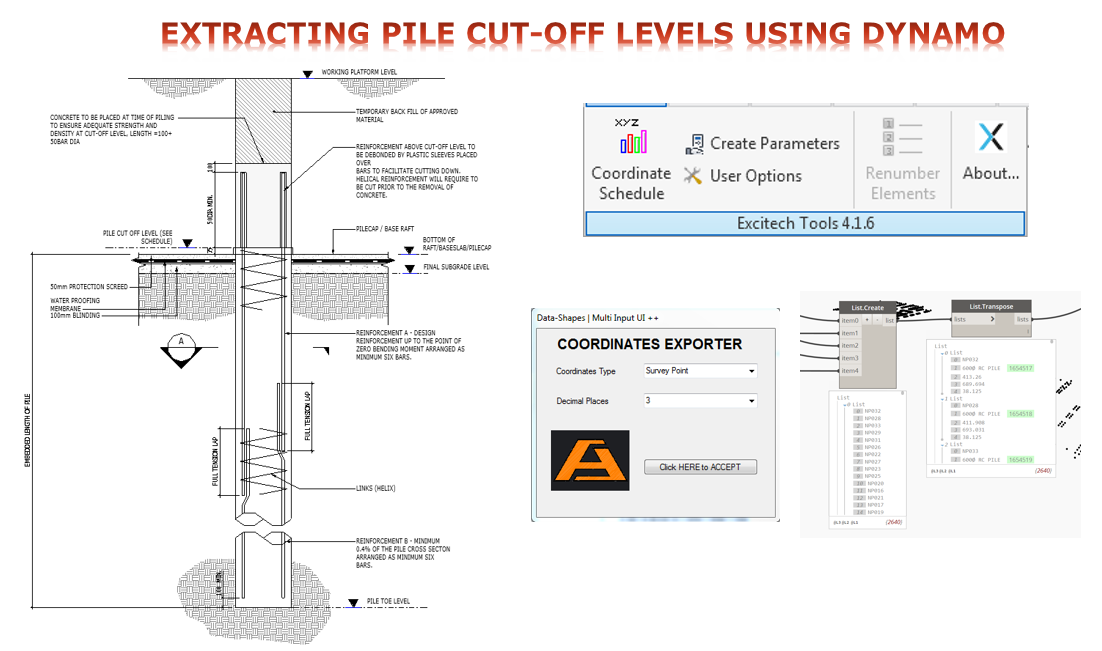
Today, I want to give an update to my Dynamo script; to include in my final output the “Pile cut-off level” values for each individual piles on my project.
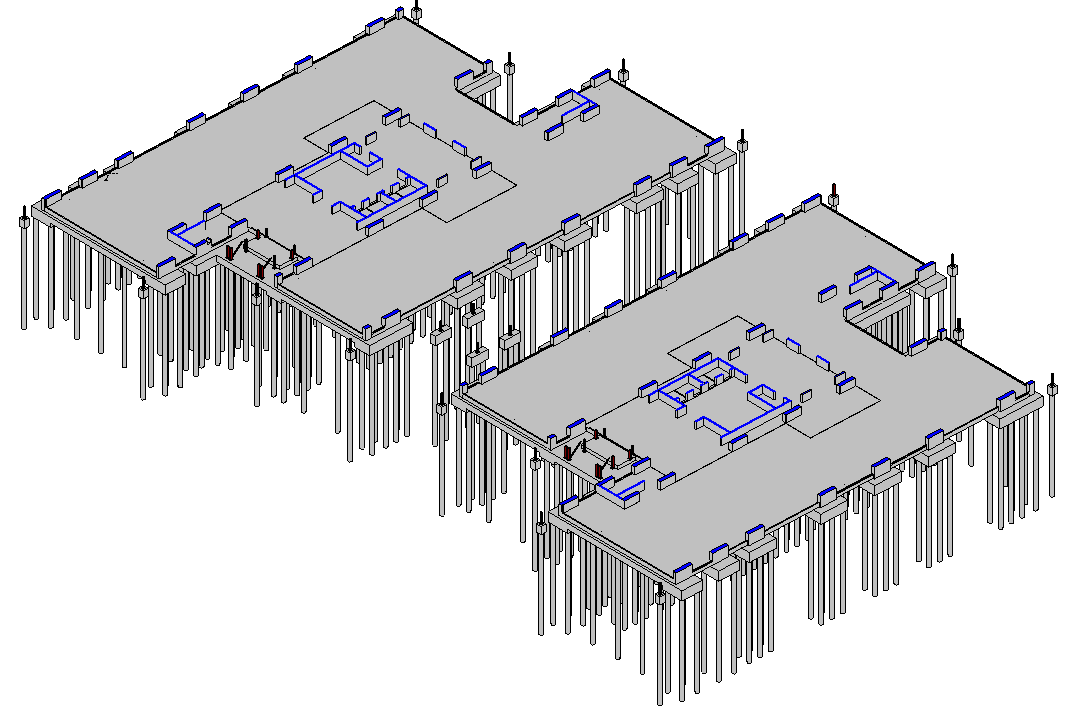
Here is the project that I’ll be looking at:
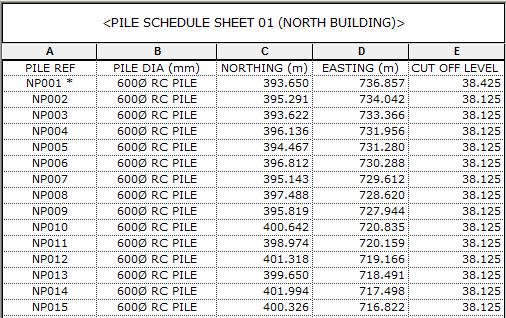
And I want to have the same result using the revised Dynamo script to one shown below.
Here is what the script looks like before from Exporting Pile Coordinate from Survey Point instead of Project Base Point:
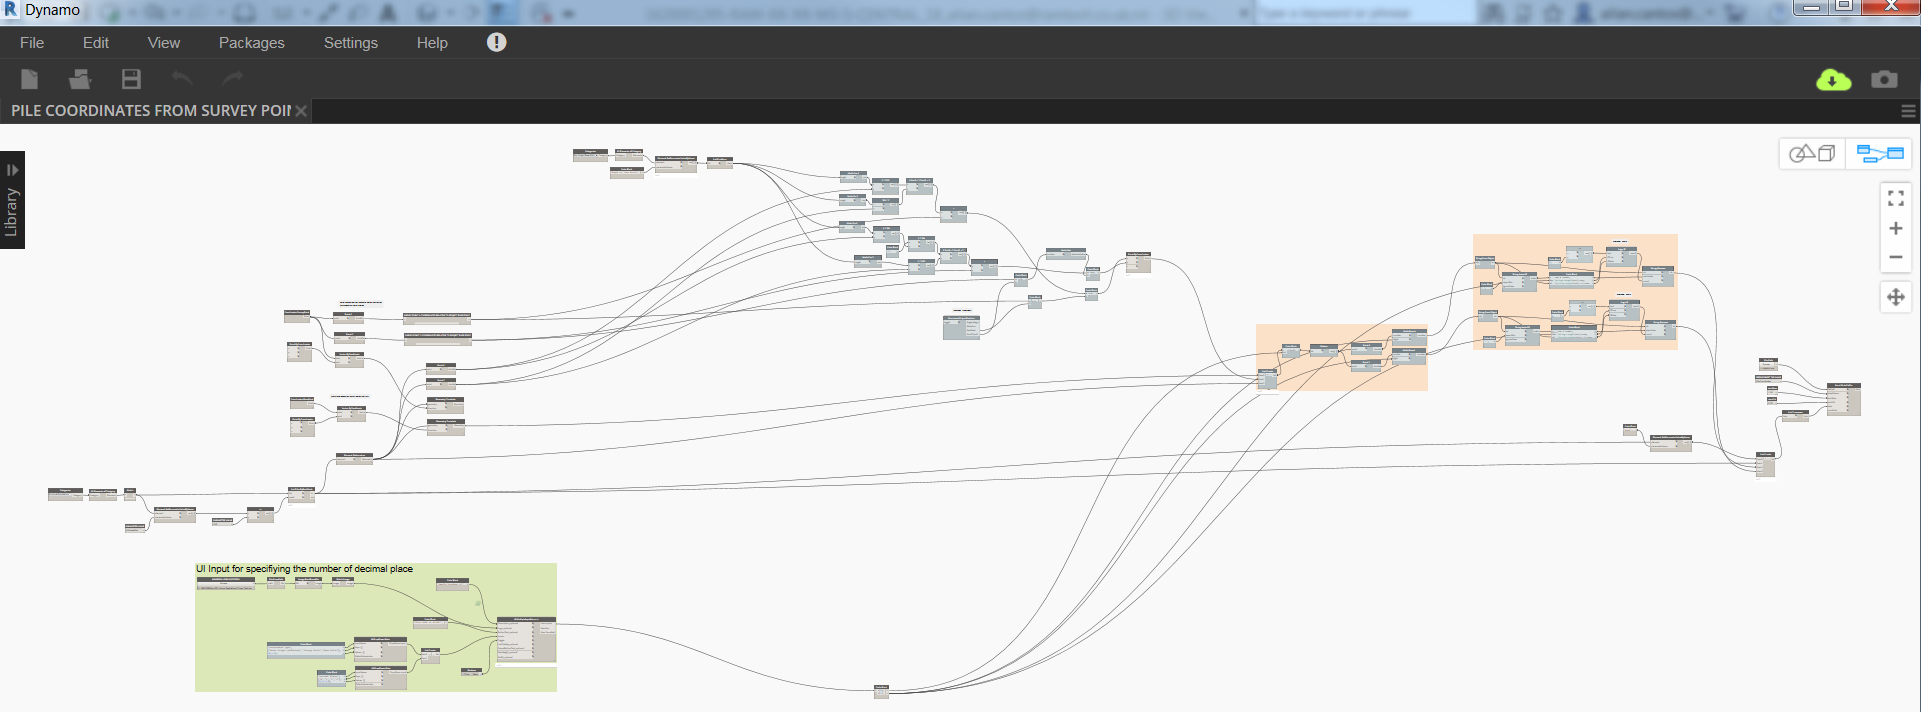
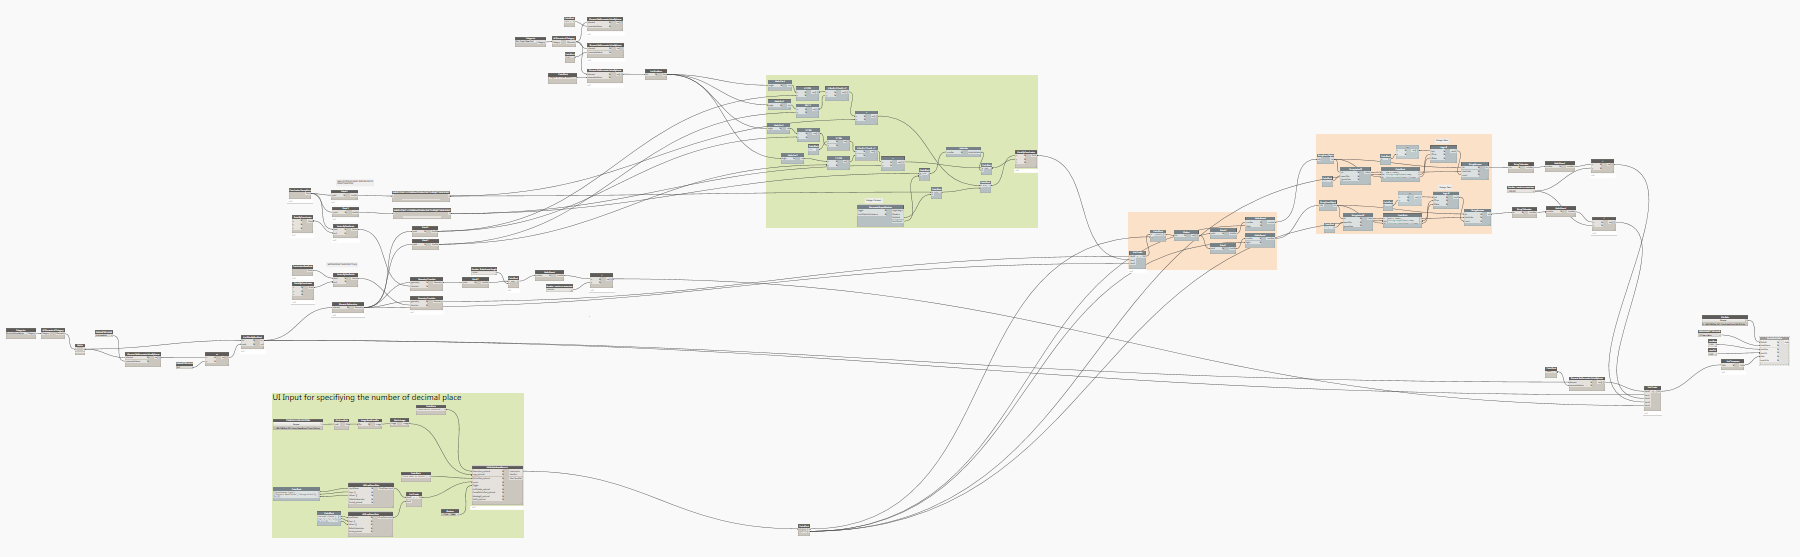
And here is it now after the upgrade:
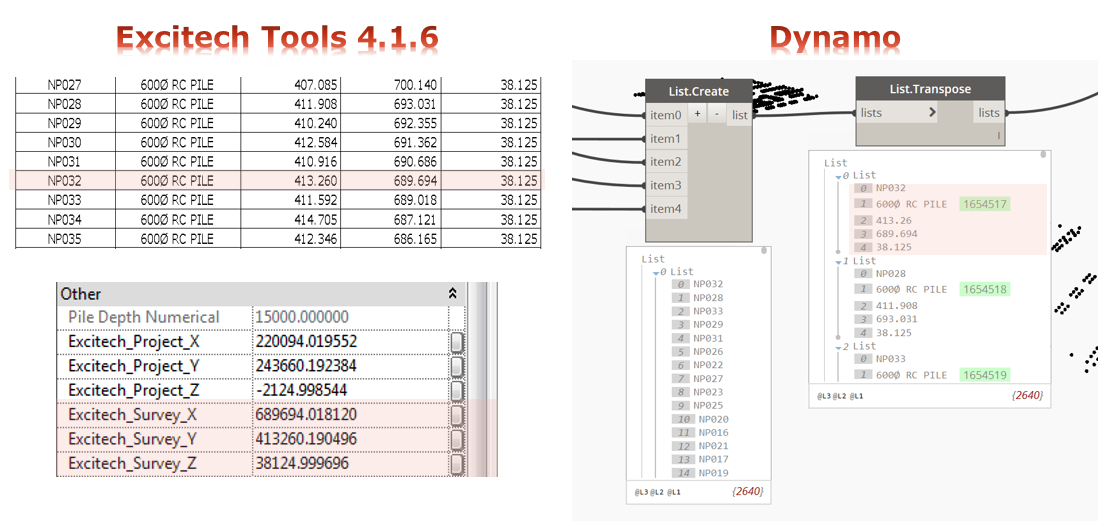
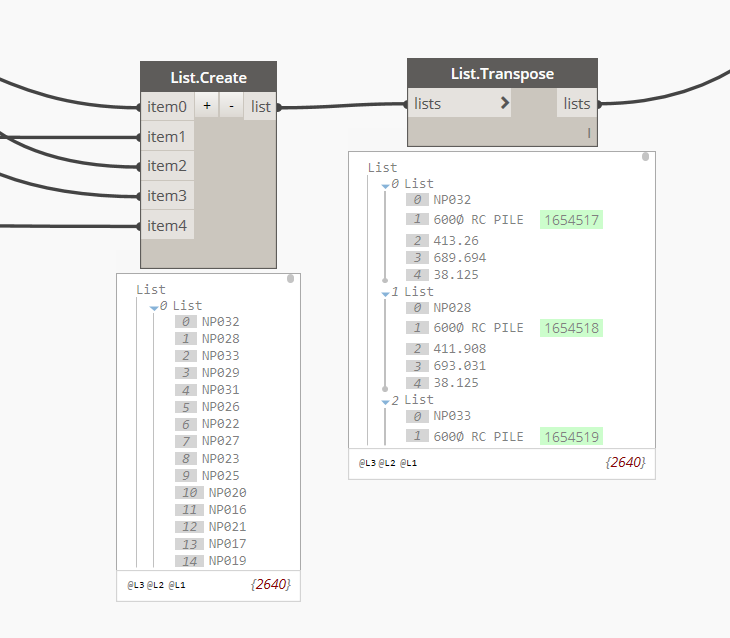
And the result when I “Run” the script and the comparison to Excitech Tools:
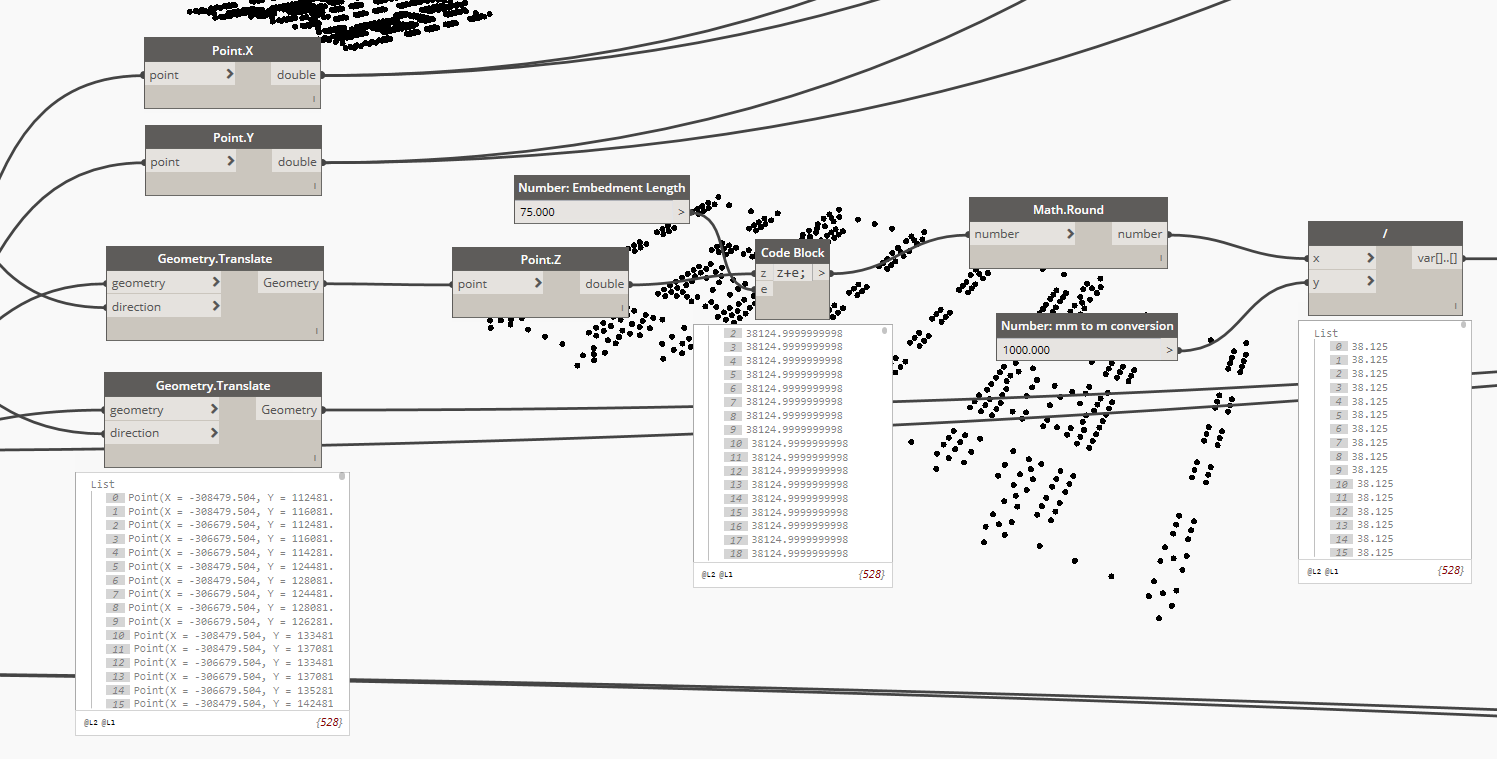
The first update I did was to extract the z-coordinates (Point.z node) and add 75mm (check this value with your structural engineer) for the “Embedment Length”, then round-up the result before converting the units from millimetres to meters. One thing that you need to make sure is that your pile is attached to the bottom of your pile cap. The 75mm embedment length calculation begins at the topmost level of the pile.
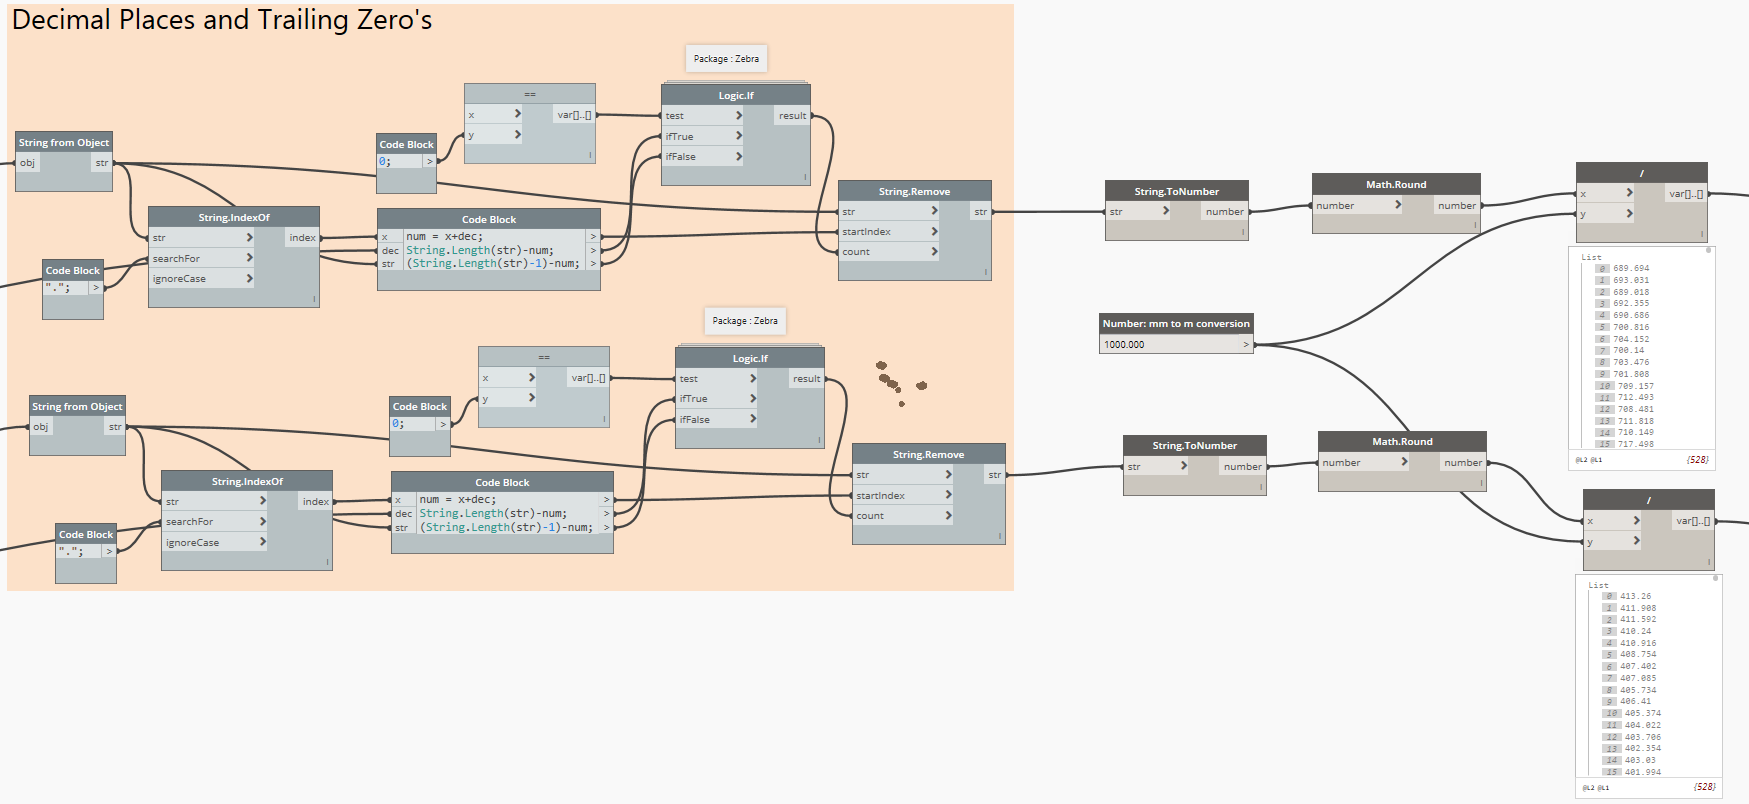
Another update I did was to convert the result from the “String.Remove” node to a number using the “String.ToNumber” node in order for me to convert the unit as well from millimetres to meters. As you may already know, the information provided by the “String.Remove” node is considered as a string and this is the reason why I need to convert it to a number first in order for the “Divide” node to work.
And finally, add a new item, item4, from List.Create node to include the pile cut-off level.
Now I am ready to assign this values to my Northing, Easting, and Pile Cut-off Level project parameters using my separate Dynamo script.
You can use this workflow if you don’t have Excitech Tools installed on your machine as part of your Revit Add-ins.
If you want to give it a try, please fill up a few details below and you will receive the download link.
I welcome your comments, questions, corrections and additional information relating to this article. If you know a better way, please leave your comment, by all means, let me know. Thanks.
Have a great day!
Cheers,
Allan Cantos EngTech MICE
BSc. Civil Engineering / Principal Structural Technician
Hi Allan,
I was looking for your blog to solve my problem to schedule piling, and could you please share the shared parameter for XYZ North-East coordinates? appreciated if you can share the pile/pile cap family with North-East coordinates?
Hi Salam,
You can actually export the shared parameters your local drive so you can re-use it.
I hope that helps.
Allan
Hi Allan,
I need to generate the Pile schedule, including North East/XYZ coordinates, I am not familiar to use dynamo, So could you please share any Revit family for pile which includes NE coordinates or any shared parameter you can share and I can import?
Hi Salam,
This is the reason why Dynamo comes into handy because the Pile Family don’t actually have the parameters embedded for northing/easting or XYZ-Coordinates but Dynamo can pull those values for you in the absence of third party plugin called Excitech or any other third party Revit plugins.
So how to solve without dynamo? any options?
Hi Salam,
You can either install Excitech Revit plugin (cost involved or check if there is a free trial) or try XYZ-Coordinates (https://apps.autodesk.com/RVT/en/Detail/Index?id=2470352942019857447&appLang=en&os=Win64) from Autodesk App Store.
I haven’t tried this yet, so please, let me know if that works for you.
Dear Allscan12 Blog Readers,
If you happen to create a Revit Pile Family with XYZ-Coordinates parameters, I would appreciate it much if you could please share it by replying to this request with a link where to download your Revit Pile Family.
Thank you in advance and have a great day.