Hi there,
I hope you had a wonderful Easter break.
I’ve created this post to great you all a Happy Easter.

Have a blessed day ahead. God bless you all.
Hi there,
I hope you had a wonderful Easter break.
I’ve created this post to great you all a Happy Easter.

Have a blessed day ahead. God bless you all.
Hi there, I hope you are well.
Apologies for not being able to write something in the past few weeks for being to occupied with lots of things.
Without further
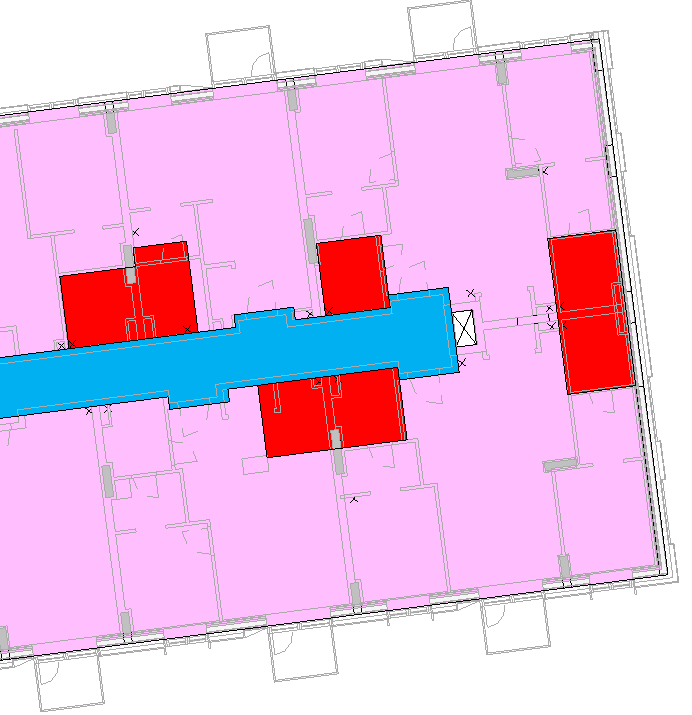
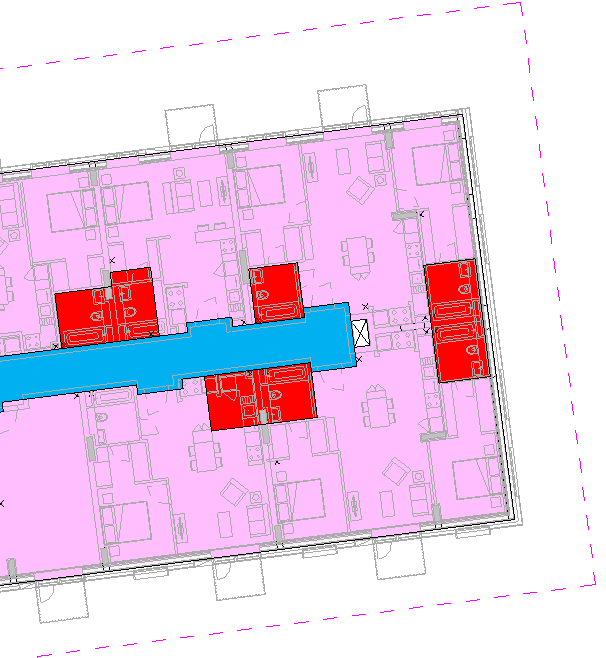
You can see from the image below that it will require some updates. It would be very helpful if you can see the furniture for you to know where exactly the bathroom (hatched in red) are located, for instance.
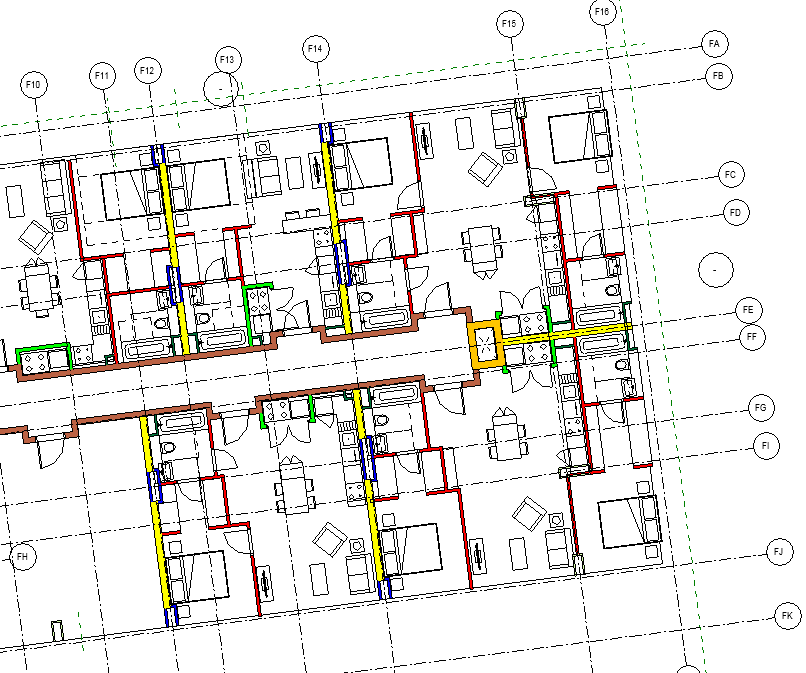
I opened the architect Revit model to check if they have the furniture layout, and yes, they have it in their model under a separate workset.
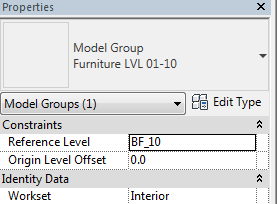
I checked my “View Template” view properties one by one and all looks good to me.
I checked the “View Range” and it also looks fine to me.
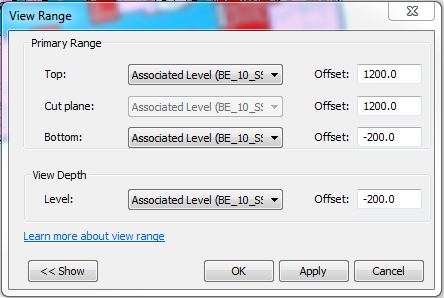
If you’re wondering why I set my “View Depth” to just 200 below my associated level is because I don’t want to see the partition walls below. All I wanted to see are the partition walls on the floor I’m looking at.
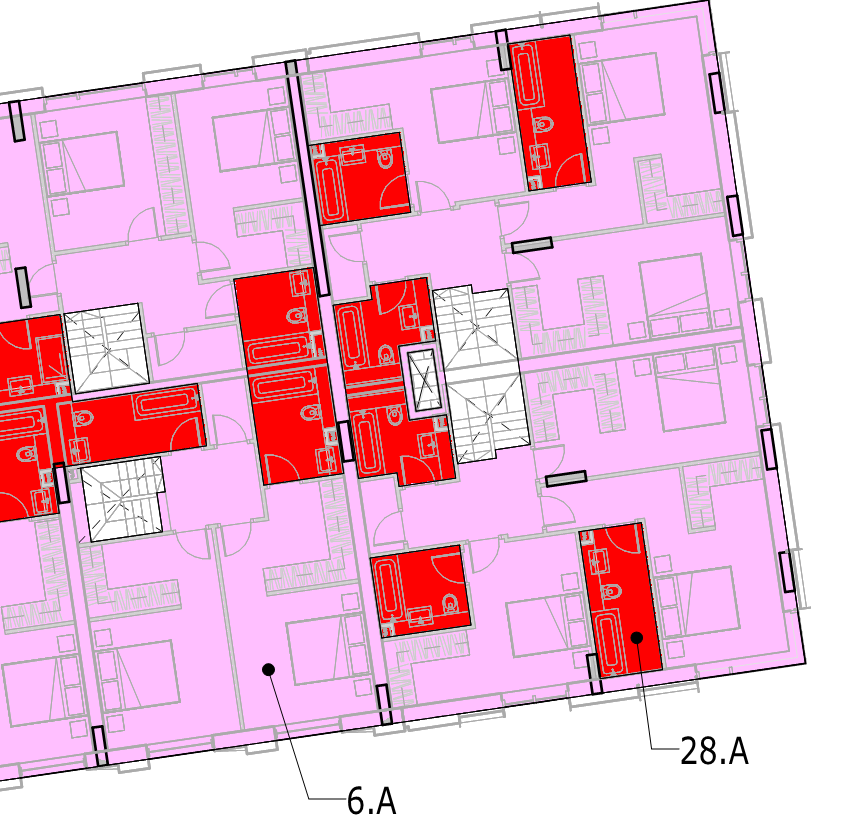
If I set the “View Depth” way below the slab soffit, say -1200, the result is, you’ll be able to see the wall partitions from the level below (making the floor plan looks complicated).
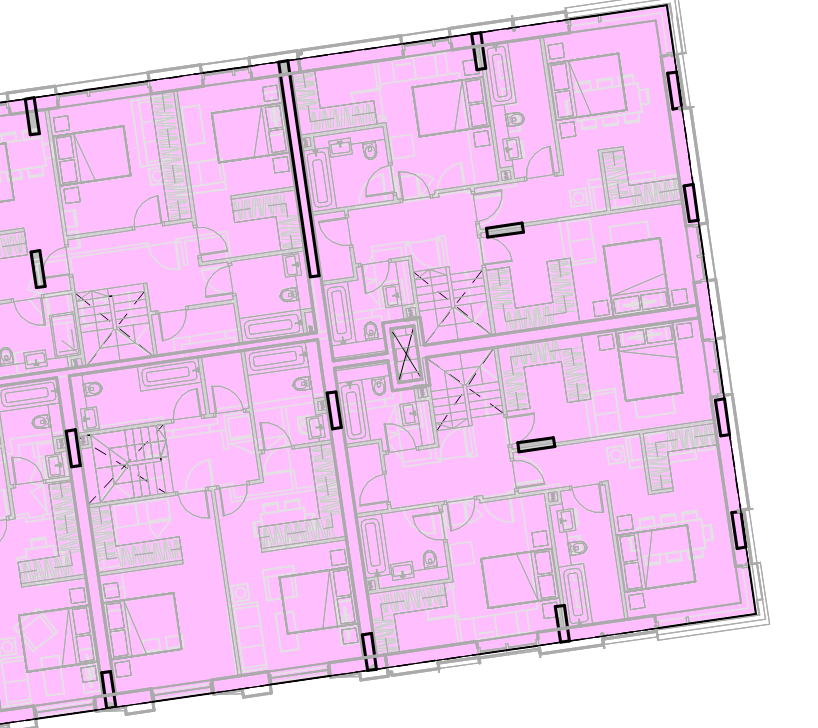
Now, I remember something and that is, for instance at Level 10, Level 10 of Building E is not the same as the Level 10 of Building F. My “View Range” associated level is from Building E. Building F Level 10 is below Building E Level 10 by 575mm.
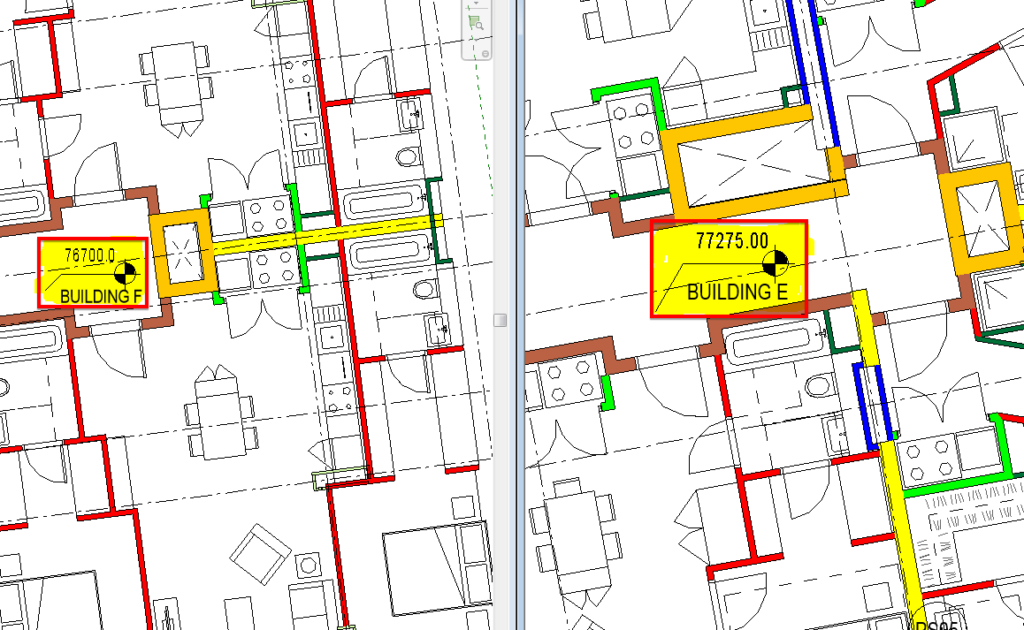
So, in order for me to see the furniture from Building F, I need to add a plan region (hidden line in magenta from the image below) in order for me to set a view range specific to Building F.
For some of you who are not familiar with “Plan Region”, I’ve written an article about this topic which you can find from visiting the link below:
After adding the “Plan Region”, I can now set my “View Depth” making it sure that my depth is within the thickness of my concrete slab floor (225mm thick concrete slab).
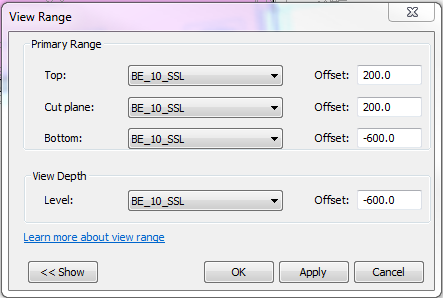
Click “Apply” and “Ok”. I should now be able to see my furniture layout.
For beginners in Revit, I hope you find this helpful.
Cheers,
Allan Cantos
BSc. Civil Engineering / Principal Structural Technician
As a result of changes to both the CSCS test booking and card application process, which now require additional security checks for group applications and all personal data to be entered individually,
Card applications are straightforward, requiring just an email to CITB with proof of relevant qualification and a phone call – no application form necessary.
Everyone aiming for CSCS card should sit the Health Safety & Environment Test for Managers and Professionals.
Ensure you are sufficiently prepared before taking your test. There are lots of mock test available in the internet.
Alternatively, download the Revision App here: CSCS Test Prep Materials
When booking your test, you will need to have:
Test bookings cost £21 and are non-refundable if cancelled within 72 hours of the test date.
You must take photo ID with you to the test centre, just in case it’s needed.
PROCESS
Upon submission of your booking you will receive:
Start your review.
Upon successful test completion, keep the certificate you are given. This will serve as evidence of your competency until your card arrives
Apply for your CSCS Card.
There are two available cards for you to choose from.
Professionally Qualified Person if chartered with a recognised institution. You will be required to provide a copy of current membership card showing membership level, or receipt of membership payment, or letter from institution clearly stating your membership level required as proof of membership.
Academically Qualified Person if you are Degree or HNC holder in the construction-related subject. You must check if your qualification is acceptable here. Proof of this qualification is required.
Non-UK qualification must be accompanied by a Statement of Compatibility from the National Academic Recognition Information Centre (NARIC). Please visit NARIC website or send an email to info@naric.org.uk for details.
Please note that the Visitor card is being phased out by CITB and will only be valid until August 2020. Staff who do not qualify for either card should visit the CSCS website to find an appropriate alternative.
Cards cost £36.
There are 2 options on how you can apply for a CSCS Card once successfully passed the test.
Option 1: Phone Application
Option 2: Postal Application with Authorisation Code