#Revit_Tips_001

Hello there.

If you are one of those Technicians who is producing drawings from a reference view Revit models, this Revit topic is for you.

Now here is the situation, the project has 3 separate models; each one has its own Revit file.

Then there is a Revit file called “Sheet Model” where these 3 models are referenced in.

The views were generated by mimicking the levels of each building to the new “Sheet Model” Revit file and use these views to create the sheets shown below.

We managed to issue the drawings last March 2017 without any problem with the views and after that, because I got busy with another project, this project has been transferred to another Technician.

I got a call from this Technician asking for help wherein he was having a problem with a reference view of a general arrangement or plan view not appearing properly on his “Sheet Model” after doing some updates. He spent an hour trying to figure out how to fix the issue.

Here is the view we want to appear on the “Sheet Model” that he fixed at the “Sports Hall” Revit model.

And here it is when you are on the “Sheet Model”. The “green area” on the lower right-hand corner seems missing or might be a view range issue.

He looked at “View Range” and made it sure that the settings he has in “Sheet Model” Revit model matches the one he has in “Sports Hall” Revit model and both were the same.

So what could be the problem why the views are not the same considering that both models are now using the same “View Range” values?

Ok, here is the solution. If this view can’t be fixed by adjusting the “View Range” from the “Host View” (Sheet Model Revit model view range settings), then I will use the “Linked View” (Sports Hall Revit model view range settings) instead.

I started looking at the “Visibility Graphics” by clicking “Edit” or type “VG” on your keyboard.

Then go to the “Revit Links” tab and click on “Custom”

Look for the “View Range” and instead of “By host view”, select “By linked view”


Click “Apply” then “OK” and another “OK” and voila! Our view is now fixed!

Here is the view that my colleague wants to achieve on his “Sheet Model” Revit model.

I hope you’ll find this trick useful. If you think I can be of help on your project, don’t hesitate to drop me an email on my “Contacts” section. I welcome your feedback, comments, questions, corrections and additional information relating to this article. If you know a better way, please leave your comment; by all means, let me know. Thanks.

Have a great day!

Cheers,

Allan Cantos

My Autodesk Revit Live Experience

Today I’ll talk about my Autodesk Go-Live experience from installation to uploading my Revit model.

For more information, please visit the Autodesk website at https://www.autodesk.com/products/revit-live/overview

Out of my curiosity, I decided to document the process of bringing my Revit model to Autodesk Go Live. So let’s begin.

I started by visiting the link I provided above and signed in using my Autodesk account. If you haven’t got one, you’re free to create one by clicking on the “Create Account” button.

Type in my username

Type in my password

And I can begin to download the 30 days free trial of Autodesk Revit Live by clicking on the “Begin Download” button.

Next is to read the terms and conditions that will pop up on the screen

I’m happy with all that is written, as if I have any other choice, tick the box required and click on “Continue”

The setup file is now downloading and once done, I’ll click on the downloaded file on the lower left-hand corner and select “Run” to start the installation.

You may need to ask your IT to have it installed on your machine if you do not have admin rights.


Just click “Yes”

Next is to click “Install” to begin the installation

Tick the “Accept” button after reading the “License and Services Agreement” and click “Next”. No other choice than to accept it anyway if I want it to be installed on my machine.

Since I have it installed already previously, I’ll cancel the installation. However, click on the “Install” button to continue with the installation process if you don’t have it installed yet on your machine.

Once the installation is finished, I can see a new plugin on my “Add-ins” menu options called “Revit Live” on my Revit panels tab.

Here is the Revit model I would like to upload on Autodesk Live.

Click on “Go Live” button under “Revit Live” panel.

Revit Go Live will try to list down any problem with the model, it will be listed here if I have some. I have to fix those problems first before moving on to the next step. In this example, I’ve got a “Visual Style” warning only and therefore I can carry on sending my structural model to Revit Go Live. Now click on “Save and Go”.

Good to see that is it working. Uploading begins…

The Revit Live service is preparing my model to be available to view in Revit Live.

The model is being sent back to me under .lvmd file extension

I received a confirmation email of what to do next once the file is downloaded on my machine.

Now I am ready to open my .lvmd file to “Autodesk Live Editor”.

This window will pop up, just click on the “x” button on the upper right-hand corner.

Autodesk Live Editor is now loading.

Now we are at the “Project Area” where all previous file you worked on will appear here. To open that .lvmd file, you can click on “Select file” or just drag and drop on the box I highlighted in “Red”.

Importing Step 1 of 2

Importing Step 2 of 2

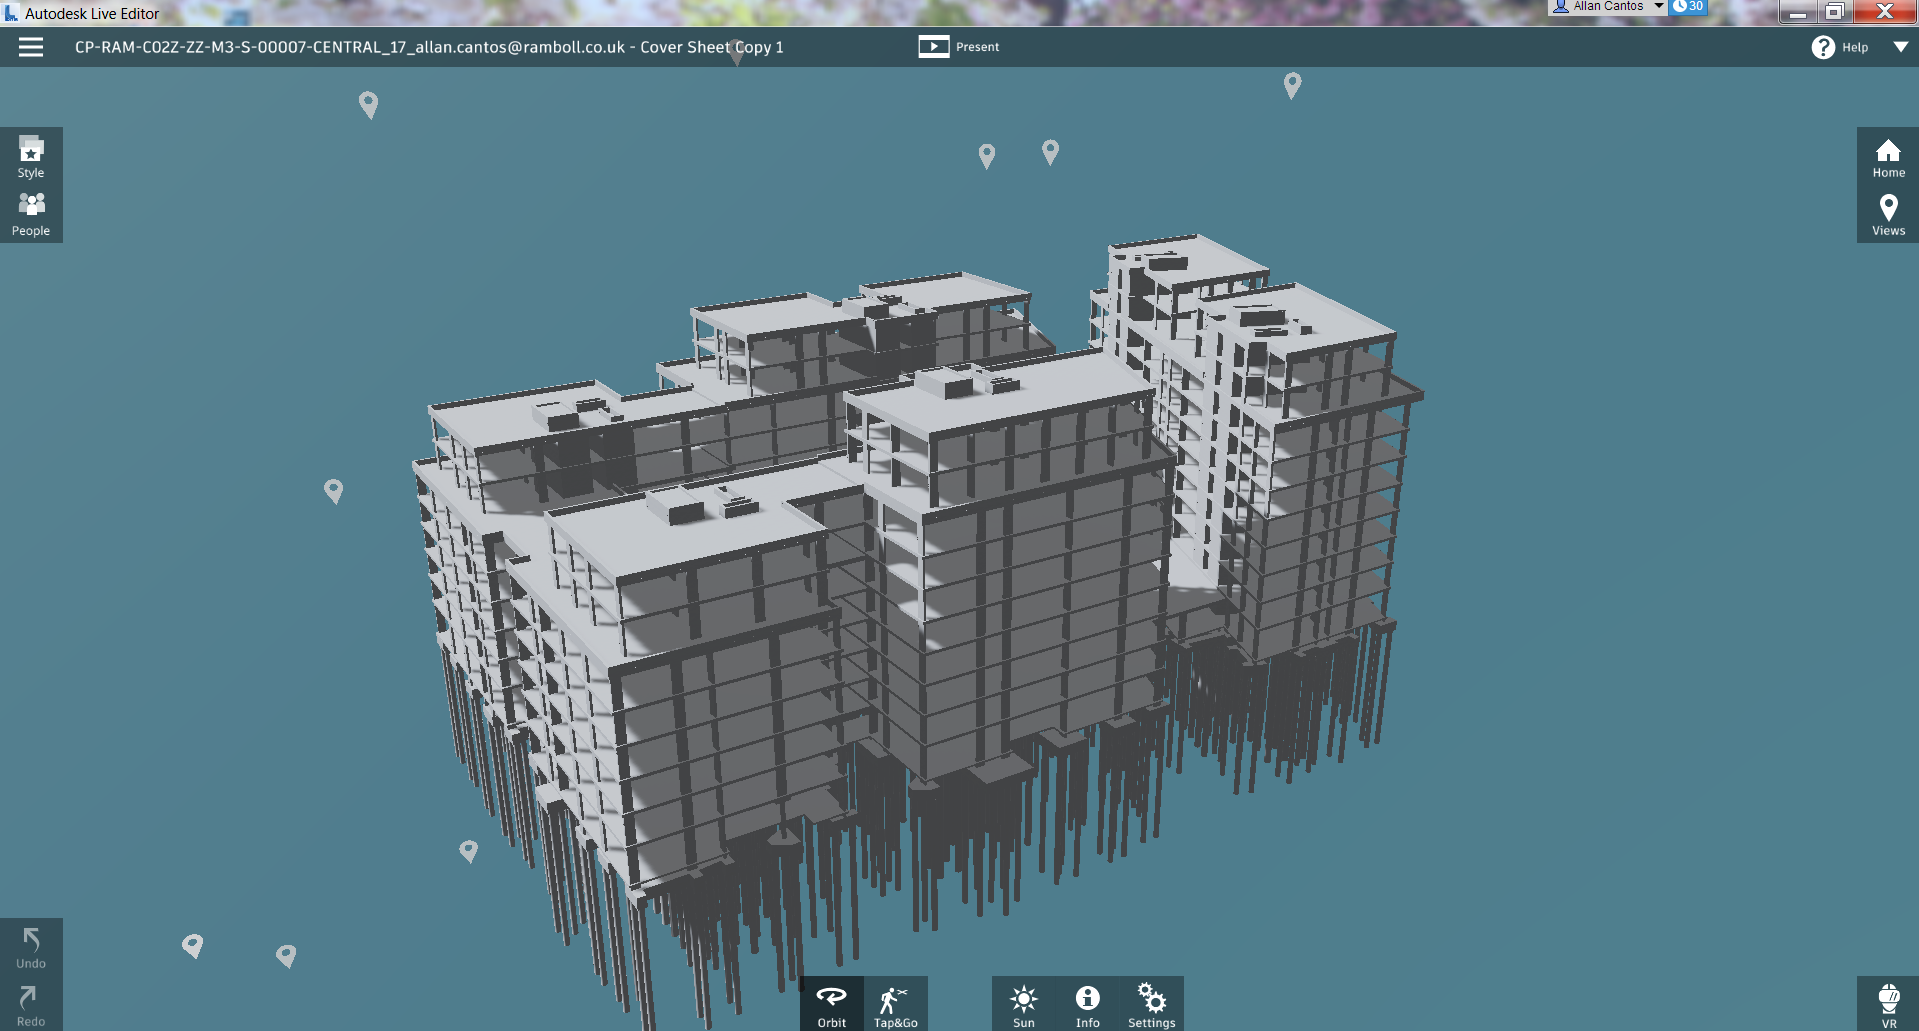
The file is now in Autodesk Live. Happy to see its working.

Video link for Autodesk Go Live test on my structural model:

And here is the link with Architectural model attached. I realized that architectural walls were missing from the Architectural Revit model, I made a wrong choice of sample model, nevertheless, I’m happy that it works.

Thanks for dropping by.

Cheers,

Allan Cantos

Positive SSL