I’m sure you’ll find the same procedure from Autodesk Knowledge Network when you Google the same topic.
After my 1TB Seagate external hard drive failed to work, I lost lots all my personal files and project-related references. Some of these files are the Revit families I created for some projects that can be re-use for my future Revit projects. Because of this, I decided to go back to those projects I worked with and start exporting copies of, not only specific families but all the families in that project to make it easy and quick.
So, let’s get started.
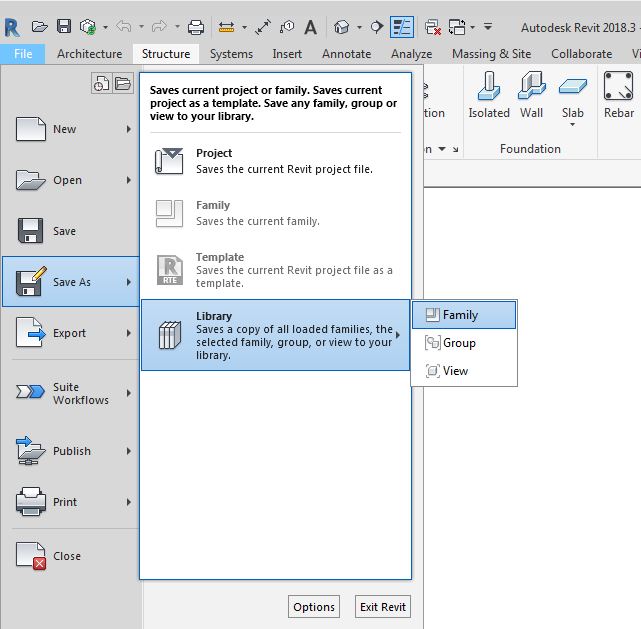
Once you have your Revit file open, go to:
File – Save As – Library – Family
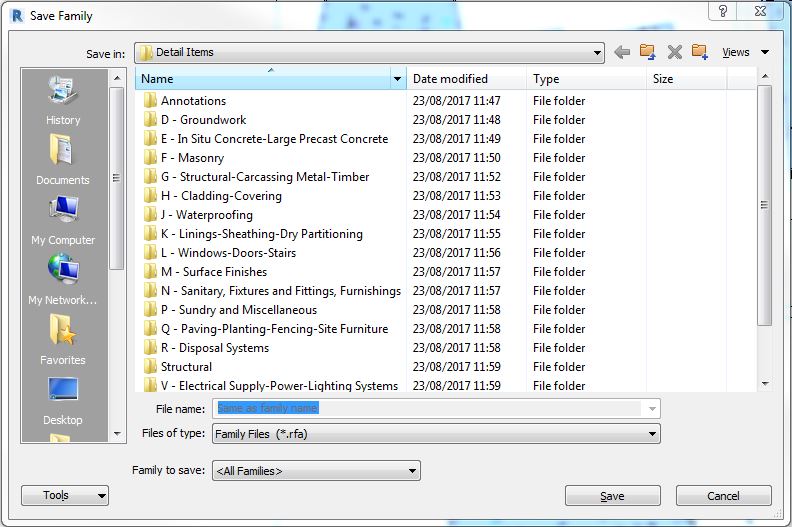
Then you’ll be prompted where do you want to save your exported
families. You may click on the “Documents” folder icon on the left to create
your own folder. Keep the rest as default then click “Save”.
And in just a few seconds or minutes, you’ll have all the
Revit families exported in your local drive.
Have you ever been in a situation wherein you wanted to edit
an element in Revit but you can’t do so because it was owned by another user
who is working in the same project? Sometimes even if the other user has synced
their model back to the central file, for whatever reason, they still own the
elements. What if the other user is on holiday? There is no way he can open the
Revit model and sync it to clear his ownership.
You don’t have to worry much if you encounter this problem
in the future. There is a quick way on how to resolve this issue by following
the procedure below.
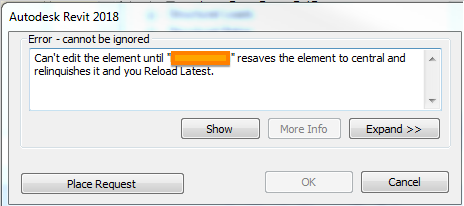
All you need to do is to keep a record of the user name (covered in orange fill) that will pop-up asking you to “Place Request”.
Sync your model to central.
Close the model.
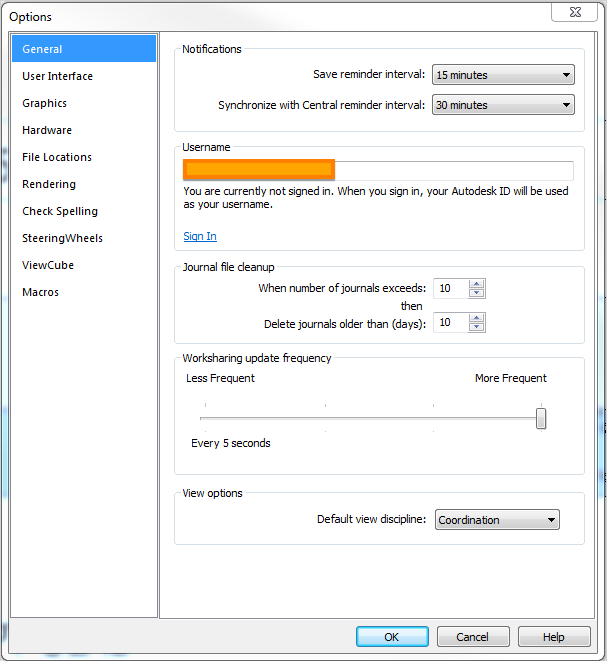
Go to “File/Options” menu. An “Options” pop-up window will appear.
Under the “General” tab, look for the “Username”(see image below) and replace it with the one in step 1.
Then create a new local copy of the model. This time it will be under the new username from step 1.
Sync the model. This will clear any pending request assigned to the username in question.
Close the model.
Go to “File/Options” menu. An “Options” pop-up window will appear.
Under the “General” tab, look for the “Username” and replace it with your username.
Create your new local copy.
Sync the model. Once syncing is done, you can now edit the element you wish to modify.
Apologies for not being able to write something in the past few weeks for being to occupied with lots of things.
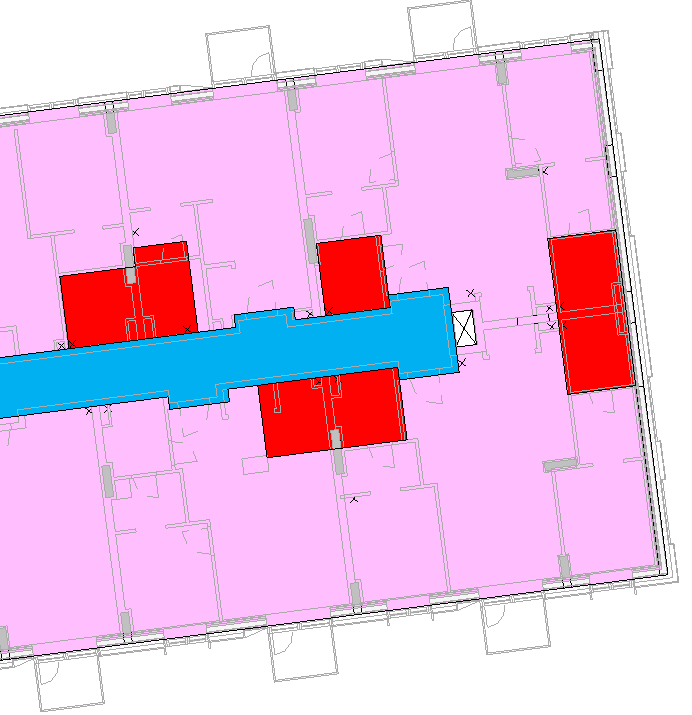
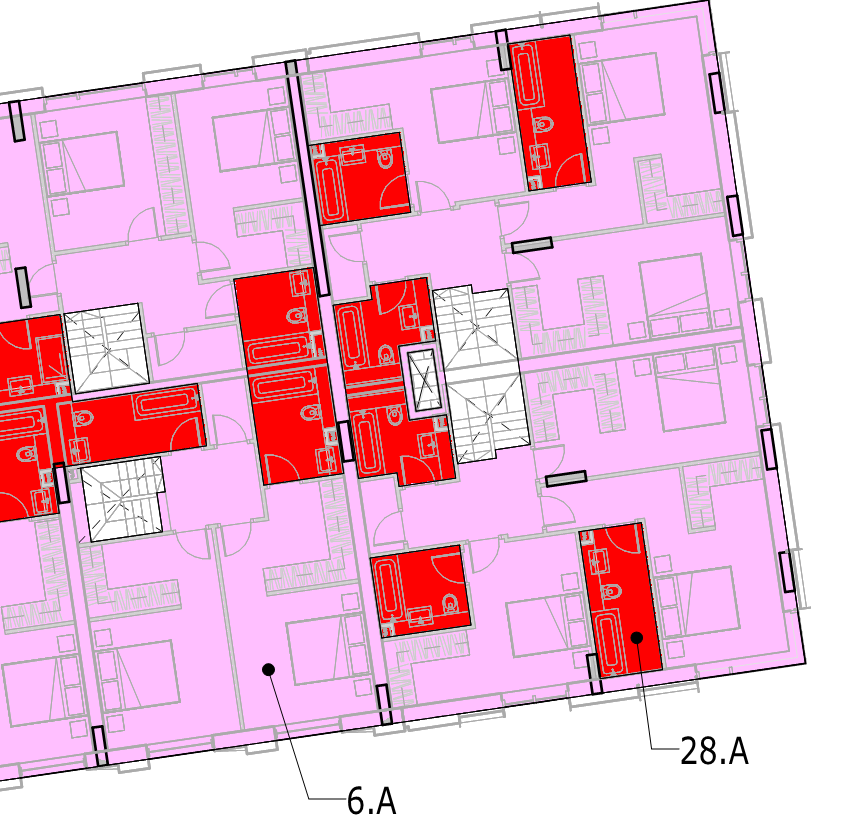
Without further a do, here is my scenario. I need to update the extents of my area loading plan hatches, however, upon reloading the latest architectural model (Building F), all I can see are the partition walls and doors and without the furniture. I have 2 building side by side, Building E and Building F. On the adjacent building, Building E, I can see the furniture.
You can see from the image below that it will require some
updates. It would be very helpful if you can see the furniture for you to know
where exactly the bathroom (hatched in red) are located, for instance.
I opened the architect Revit model to check if they have the
furniture layout, and yes, they have it in their model under a separate
workset.
I checked my “View Template” view properties one by one and all
looks good to me.
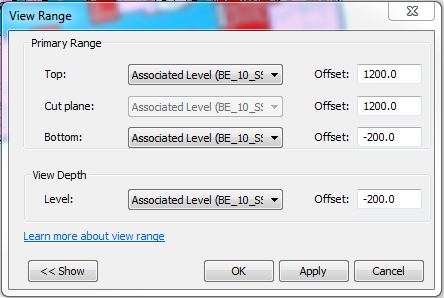
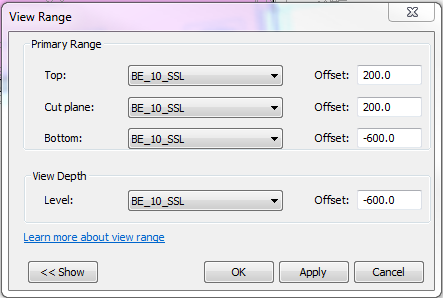
I checked the “View Range” and it also looks fine to me.
If you’re wondering why I set my “View Depth” to just 200
below my associated level is because I don’t want to see the partition walls
below. All I wanted to see are the partition walls on the floor I’m looking at.
If I set the “View Depth” way below the slab soffit, say
-1200, the result is, you’ll be able to see the wall partitions from the level
below (making the floor plan looks complicated).
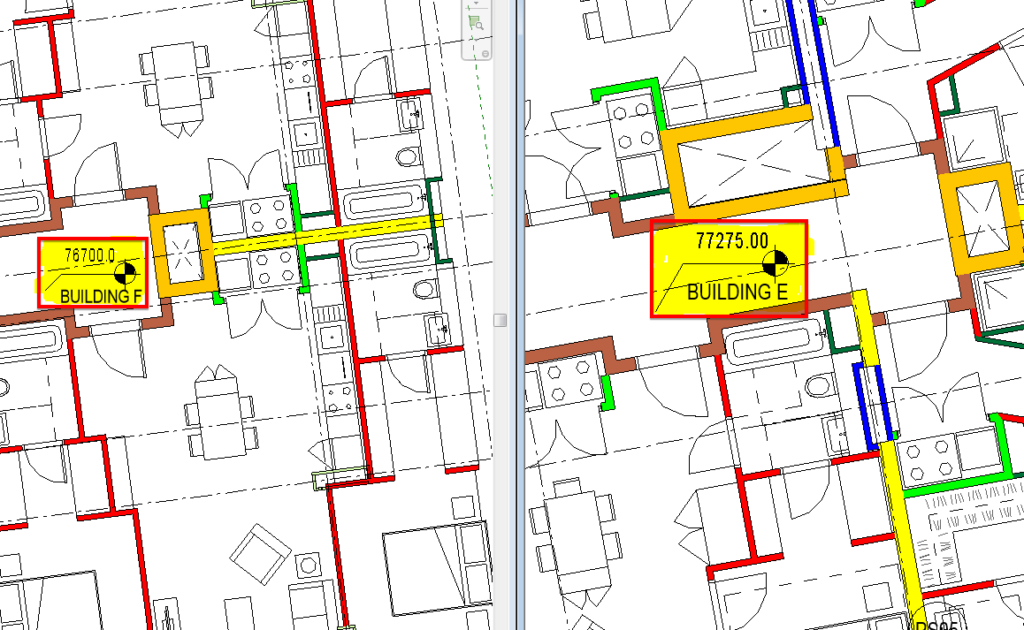
Now, I remember something and that is, for instance at Level
10, Level 10 of Building E is not the same as the Level 10 of Building F. My “View
Range” associated level is from Building E. Building F Level 10 is below
Building E Level 10 by 575mm.
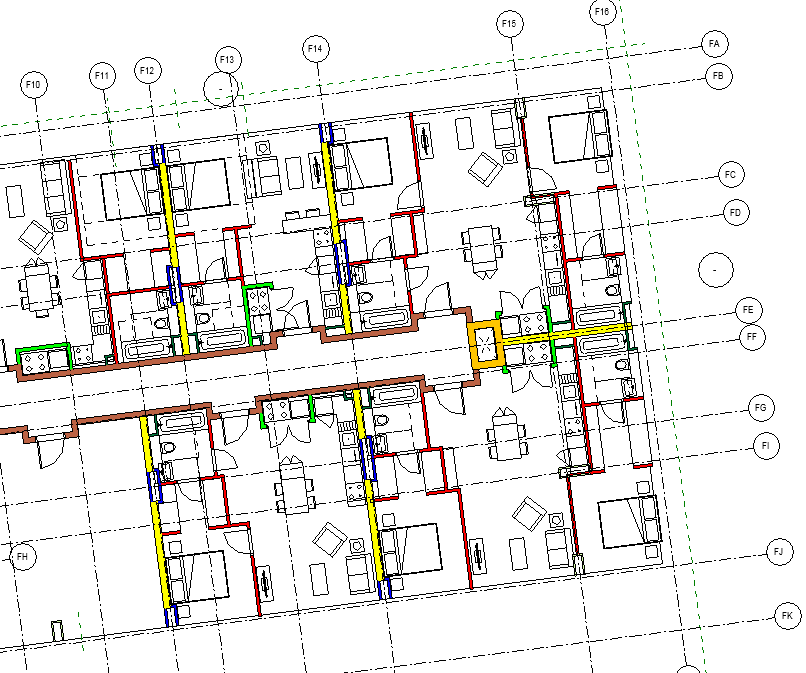
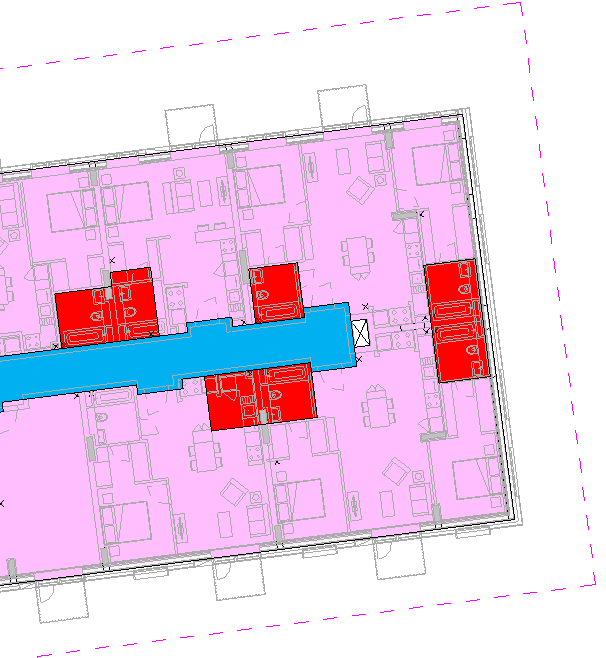
So, in order for me to see the furniture from Building F, I
need to add a plan region (hidden line in magenta from the image below) in order
for me to set a view range specific to Building F.
For some of you who are not familiar with “Plan Region”, I’ve
written an article about this topic which you can find from visiting the link
below:
After adding the “Plan Region”, I can now set my “View Depth”
making it sure that my depth is within the thickness of my concrete slab floor
(225mm thick concrete slab).
Click “Apply” and “Ok”. I should now be able to see my
furniture layout.
For beginners in Revit, I hope you find this helpful.
Cheers,
Allan Cantos
BSc. Civil Engineering / Principal Structural Technician