Hello there, I trust you all are well.
Someone within the company asked if he can print PDF’s using dynamo with the current revisions of the drawings? I said yes but instead of using Dynamo, why don’t you use RTV Xporter tools? Most of us have this tool installed anyway on our machine. However, some do not know how to use it.
If your company doesn’t have the license for this tool, why don’t you give it a try by availing the 30 days free trial? Here is the link where you can download the “RTV Xporter” Revit plugin.
https://www.rtvtools.com/product/rtv-xporter/

I know some of you who have been using Revit for a number of years find this not interesting but for those who are just starting to learn Revit, carry on reading this post.
Today I will talk about how to add the parameter which you can use as a filter in selecting the drawings you want to print using RTV Xporter Tools add-in in Revit.
This is just one way of extracting PDF/DWG/DWF/ etc. in your Revit model and, honestly, it works for me well.

I will add an additional text parameter for the sheets. As you can see here, I only have Graphics and Identity Data as my sheet parameters.
Let me first create a Shared Parameter.


Save it to the project folder or you can open your company Shared Parameter and add this to that, if it allows you to do so, if not, just create one and save it to your project folder.

For this demonstration, I save it on My Documents folder as shown below then create a new Group.
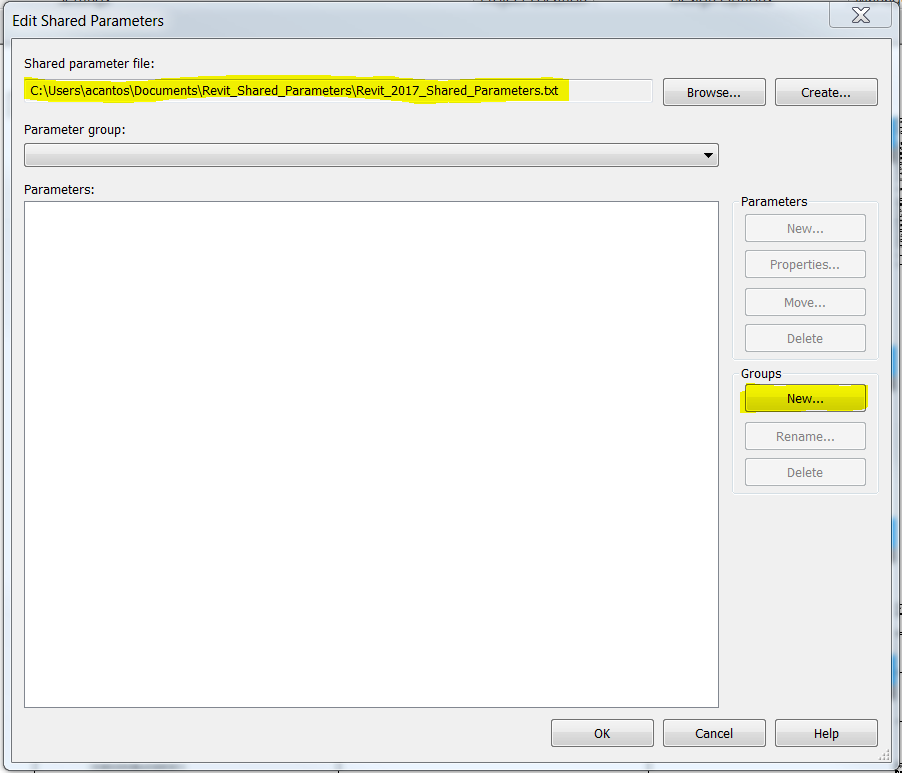
Add the Parameter Group Name

Here you’ll create your new parameter. I called it “Print_Date” under “Text” type parameter.

Click OK then OK.

Next, I will add this new text parameter as one of our Project Parameters. Click on Project Parameters under the Manage tab.

Click Add…

Choose the Shared Parameter and only choose “Sheets” under categories
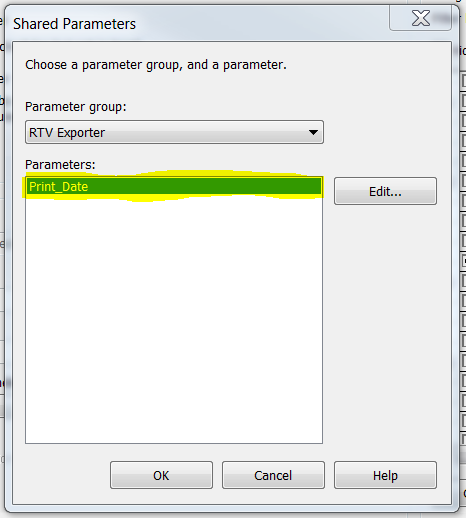
Select the newly created text parameter then click OK.
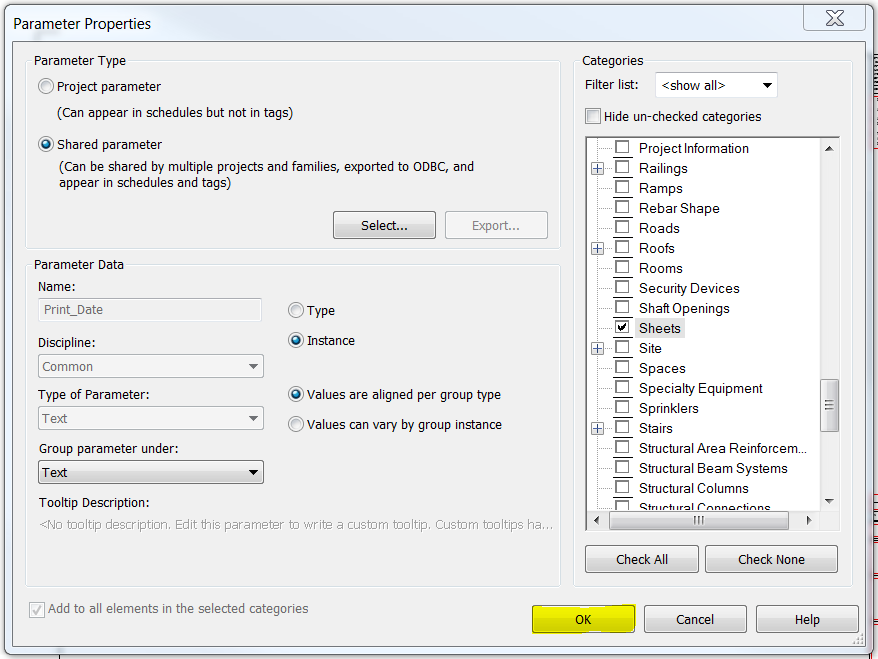
Click OK to exit the Parameter Properties window.

As you can see, the new text parameter is now added as one of your Sheet Parameters.

Now, I’ll highlight all the sheets I wish to print and put any value on the Print_Date parameter. For this exercise, I will use today’s date.

Next, go to the RTV Tools tab and click on the Xporter icon.

A getting started with RTV Xporter will pop up and I encourage you all to visit each section to help you familiarize with its interface and functions. If you do not want to see this window the next time you open RTV Xporter, just untick “Show at startup”.
Next, click “Close” and it will bring me to the RTV Xporter interface.

Go to Project Parameters tab and click on Parameters

Make sure the newly added parameter is checked.
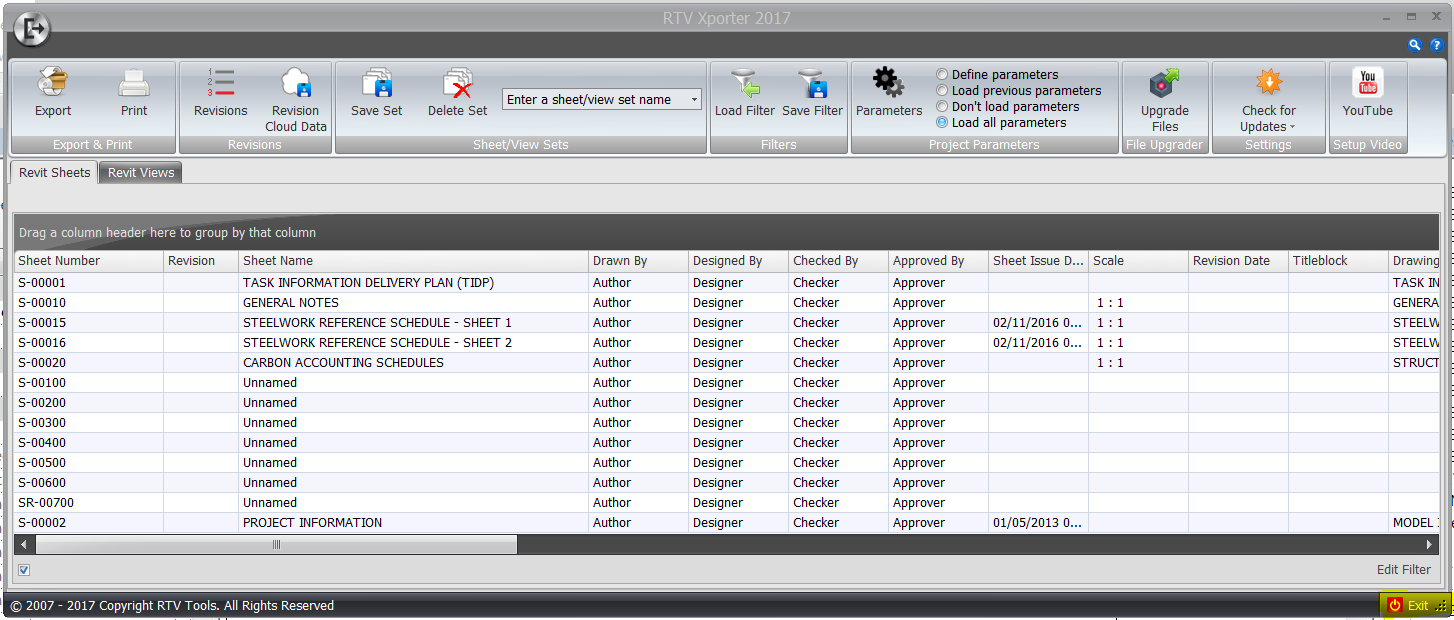
Then I have to close the RTV Xporter window in order for the new parameter to take effect. Click “Exit” which can be found in the lower right-hand corner.

Open again the RTV Xporter tools.

As you can see, Print_Date is now added in one of the columns. You just need to scroll right to find this column.

And here, I have the ability to filter all the drawings as shown.
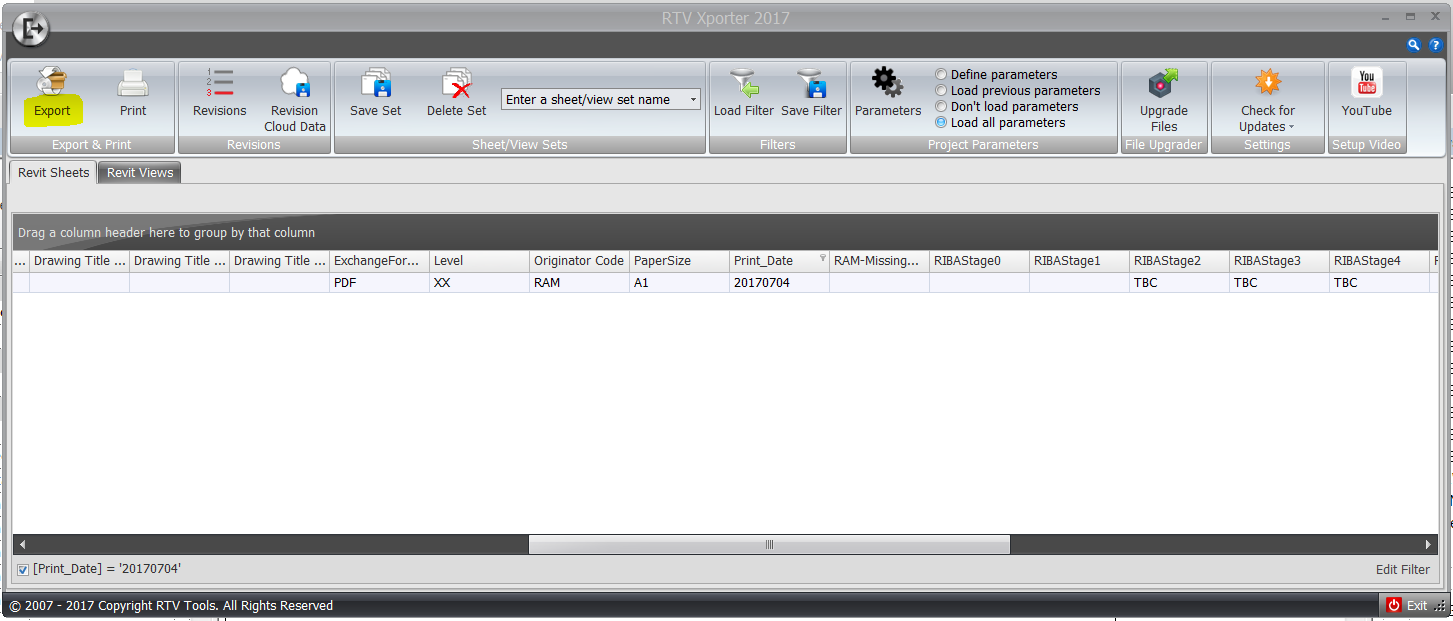
All the drawings with 20170704 Print_Date parameter value will be filtered as shown.
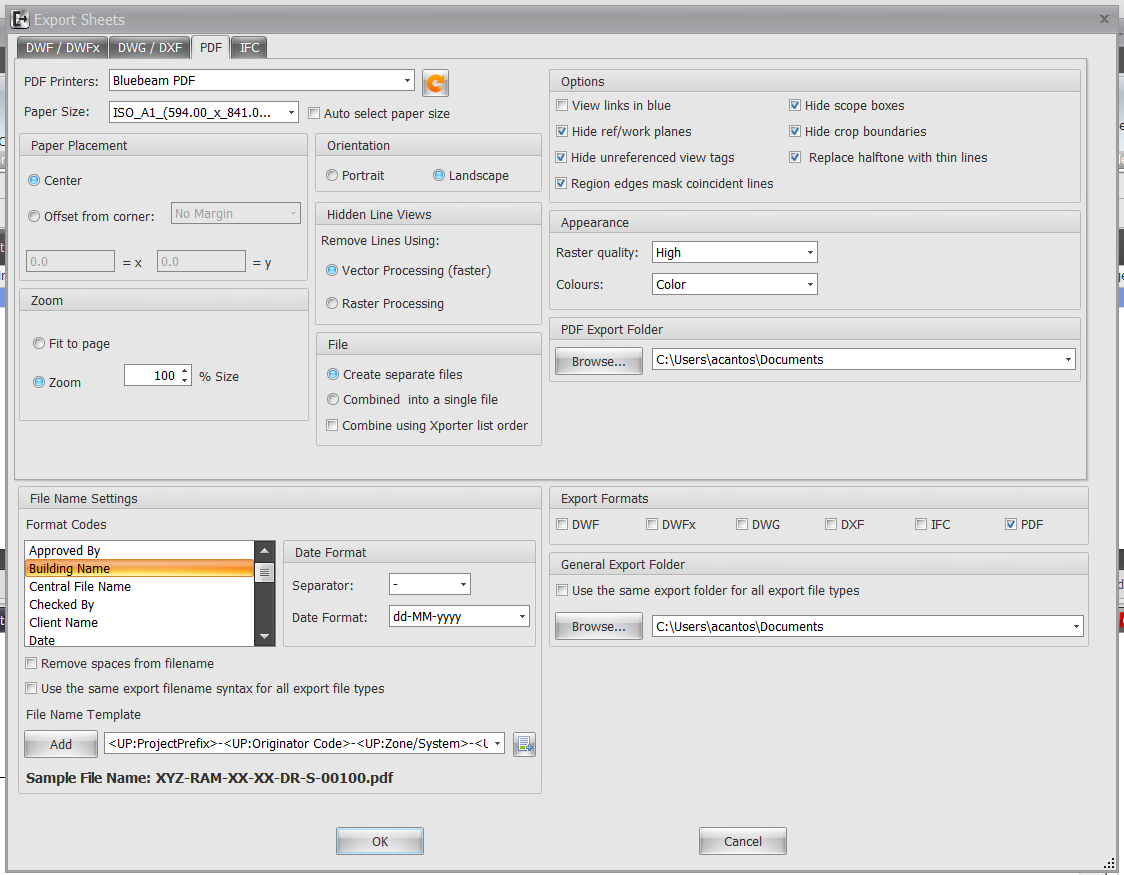
And here is where I configure your printing settings and output. This section should be covered in the video tutorial that you can be accessed in the RTV Xporter Startup window or YouTube icon located in the upper right-hand corner.
Let me use Bluebeam PDF as my PDF Printer.

It will be annoying if you have 100 sheets to print and you need to click the Save button for each individual file.
To fix it, jump to your Bluebeam and follow the procedure below.


Then un-check the option saying “Prompt for File Name”
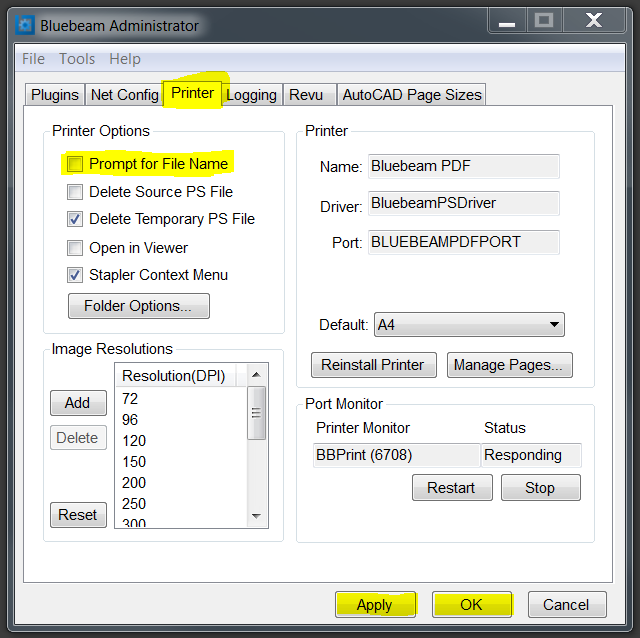
That should be it. The next time you print using RTV Xporter Tools, you don’t need to hit save for each individual drawings.
Again, this is just one of the options in exporting PDF/DWG/DWF etc. if you have RTV Xporter. If you don’t have one, printing can be accessed in the Revit menu options.
Sharing will enrich
everyone with more knowledge.
Ana Monnar
(*1954, Cuban-born, founder of Readers Are Leaders U.S.A.)
I welcome your comments, questions, corrections and additional information relating to this article. If you know a better way, please leave your comment, by all means, let me know.
If you want to create your own WordPress blog/website, signup by using the link below.
https://refer.wordpress.com/r/1852/wordpress-com/
Have a great day!
Cheers,
Allan Cantos
